Do you want to keep an eye on your home or office when you’re not around? A spy camera can be a great tool for surveillance. You can purchase a spy camera online, but it can be expensive. If you’re looking for a cheaper option, you can make a spy camera from scratch. In this article, we’ll guide you through the steps to create your own spy camera.
Materials Needed To Make A Spy Camera From Scratch

Before we start, let’s gather the materials you’ll need:
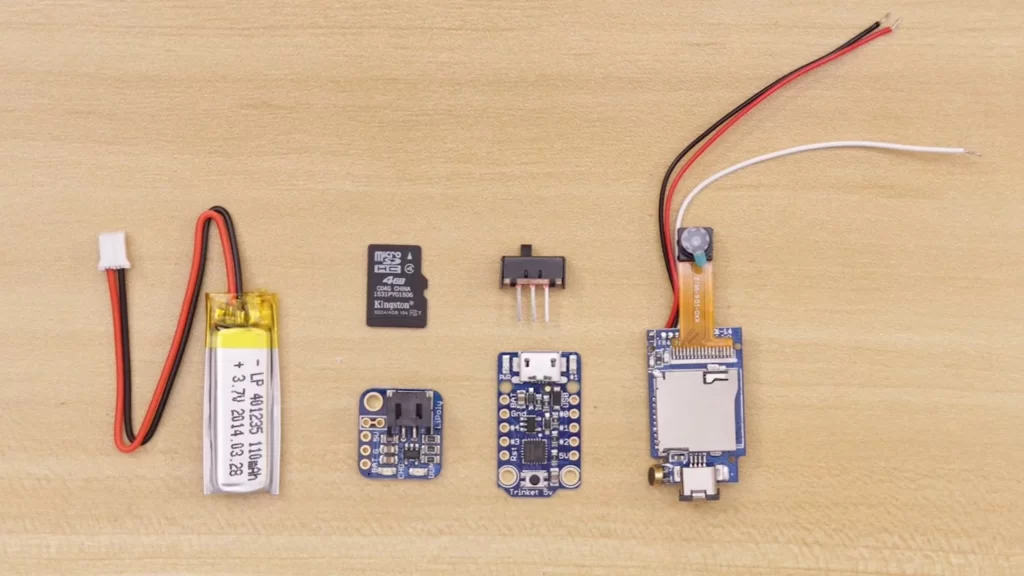
- Small camera module
- Raspberry Pi Zero W
- Micro SD card (8GB or more)
- Power bank
- Miniature lenses
- Soldering iron
- Thin wire
- USB to TTL serial cable
- Screwdriver
- Glue
A Step-by-Step Guide to Make a Spy Camera from Scratch

Step 1: Setting Up the Raspberry Pi
The Raspberry Pi will be the brain of the spy camera. First, we need to set up the Raspberry Pi Zero W. Follow these steps:
- Download the Raspberry Pi OS Lite from the official website.
- Burn the image to the micro SD card using software like BalenaEtcher.
- Insert the micro SD card into the Raspberry Pi Zero W.
- Power up the Raspberry Pi Zero W using the power bank.
Step 2: Connecting the Camera Module
Next, we need to connect the camera module to the Raspberry Pi. Follow these steps:
- Solder the thin wire to the camera module’s contacts.
- Connect the camera module to the Raspberry Pi’s camera slot.
- Boot up the Raspberry Pi.
Step 3: Setting up the Camera Software
To make the camera work, we need to set up the software. Follow these steps:
- Open the Terminal on the Raspberry Pi.
- Type in “sudo raspi-config” and press Enter.
- Navigate to “Interfacing Options” and select “Camera”.
- Enable the camera interface and reboot the Raspberry Pi.
Step 4: Installing the Motion Software
Now, we need to install the motion software. This software will allow us to capture video from the camera. Follow these steps:
- Type in “sudo apt-get update” and press Enter.
- Type in “sudo apt-get install motion” and press Enter.
- Wait for the software to install.
Step 5: Configuring the Motion Software
After installing the motion software, we need to configure it. Follow these steps:
- Type in “sudo nano /etc/motion/motion.conf” and press Enter.
- Find the “stream_localhost” option and change it to “off”.
- Find the “stream_port” option and change it to “8081”.
- Save the changes and exit.
Step 6: Attaching the Lenses
Now, we need to attach the lenses to the camera module. Follow these steps:
- Glue the lenses to the camera module.
- Adjust the focus of the lenses until the picture is clear.
Step 7: Testing the Spy Camera
After completing all the previous steps, we can now test the spy camera. Follow these steps:
- Connect the Raspberry Pi to a monitor or TV using an HDMI cable.
- Open a web browser and type in “http://localhost:8081”.
- The motion software should open, and you should see the video captured by the camera.
Congratulations! You’ve successfully made a spy camera from scratch. You can now use it to keep an eye on your home or office.
FAQs
Can I use a different camera module for this project?
Yes, as long as it is compatible with the Raspberry Pi and has similar specifications to the camera module listed in the materials section.
Can I use a different Raspberry Pi model for this project?
Yes, but the steps may vary slightly depending on the model you use.
Can I use a different software instead of Motion for capturing video?
Yes, there are other software options available, but Motion is a popular and reliable choice for this type of project.
Can I add more than one camera to the Raspberry Pi?
Yes, but you will need to follow the appropriate steps to set up each camera module and configure the software accordingly.
Can I use this spy camera for illegal purposes?
Absolutely not. This spy camera should only be used for legal and ethical purposes, such as monitoring your home or office for security purposes. Any illegal use of this device is strictly prohibited.
Conclusion
Making a spy camera from scratch may seem daunting, but it’s actually not that difficult. With the right materials and following the steps outlined in this article, you can create your own spy camera at a fraction of the cost of purchasing one online. Not only is this a fun project to undertake, but it also provides added security and peace of mind knowing that you can keep an eye on your surroundings when you’re not there.
References:
https://gadgetpursuit.com/how-to-make-a-spy-camera/
https://www.wikihow.com/Make-a-Hidden-Camera

Greetings, I’m Jotham Leopold, the enthusiast and mind behind ExpertDecider.Com. Holding a degree in Management Information Systems from the University of Wisconsin, I ventured into the professional world as an Information Technology Consultant. However, my passion extends beyond the corporate realm. Beyond the algorithms and codes of my IT career, I’ve always been captivated by the sleek world of electronics. This fascination led to the creation of ExpertDecider.Com, a platform where my expertise as an IT Consultant converges with my fervor for the latest gadgets.